In this part of the guide, we will use AskUI Studio to send an email with a PDF file attached. We will start with the condition where we already have a PDF file to send via email. In the example, we will use a gmail accout for the demonstration, but it would also work with any other email service.
Table of Content
- Set up the self-hosted AskUI Runner
- Automation Instructions
- The Code of the Workflow
- Conclusion
Since the AskUI-hosted Runner provides a webdriver version of the Chrome web browser, it cannot pass the login process of any google-provided services such as email or drive. And this is the moment where we need to run the Self-hosted Runner.
The Self-hosted Runner is a self-hosted component that downloads your workflows from AskUI Studio and runs them on the device it is hosted at.
To set up the Self-hosted Runner, you need to follow the steps explained in this page. Please set up the Self-hosted Runner by following the above link, and come back after finishing it.
Automation Instructions
Let's say that we have created a new Workflow in the AskUI Studio. If you are new to AskUI Studio, you can follow the first half of the previous guide.
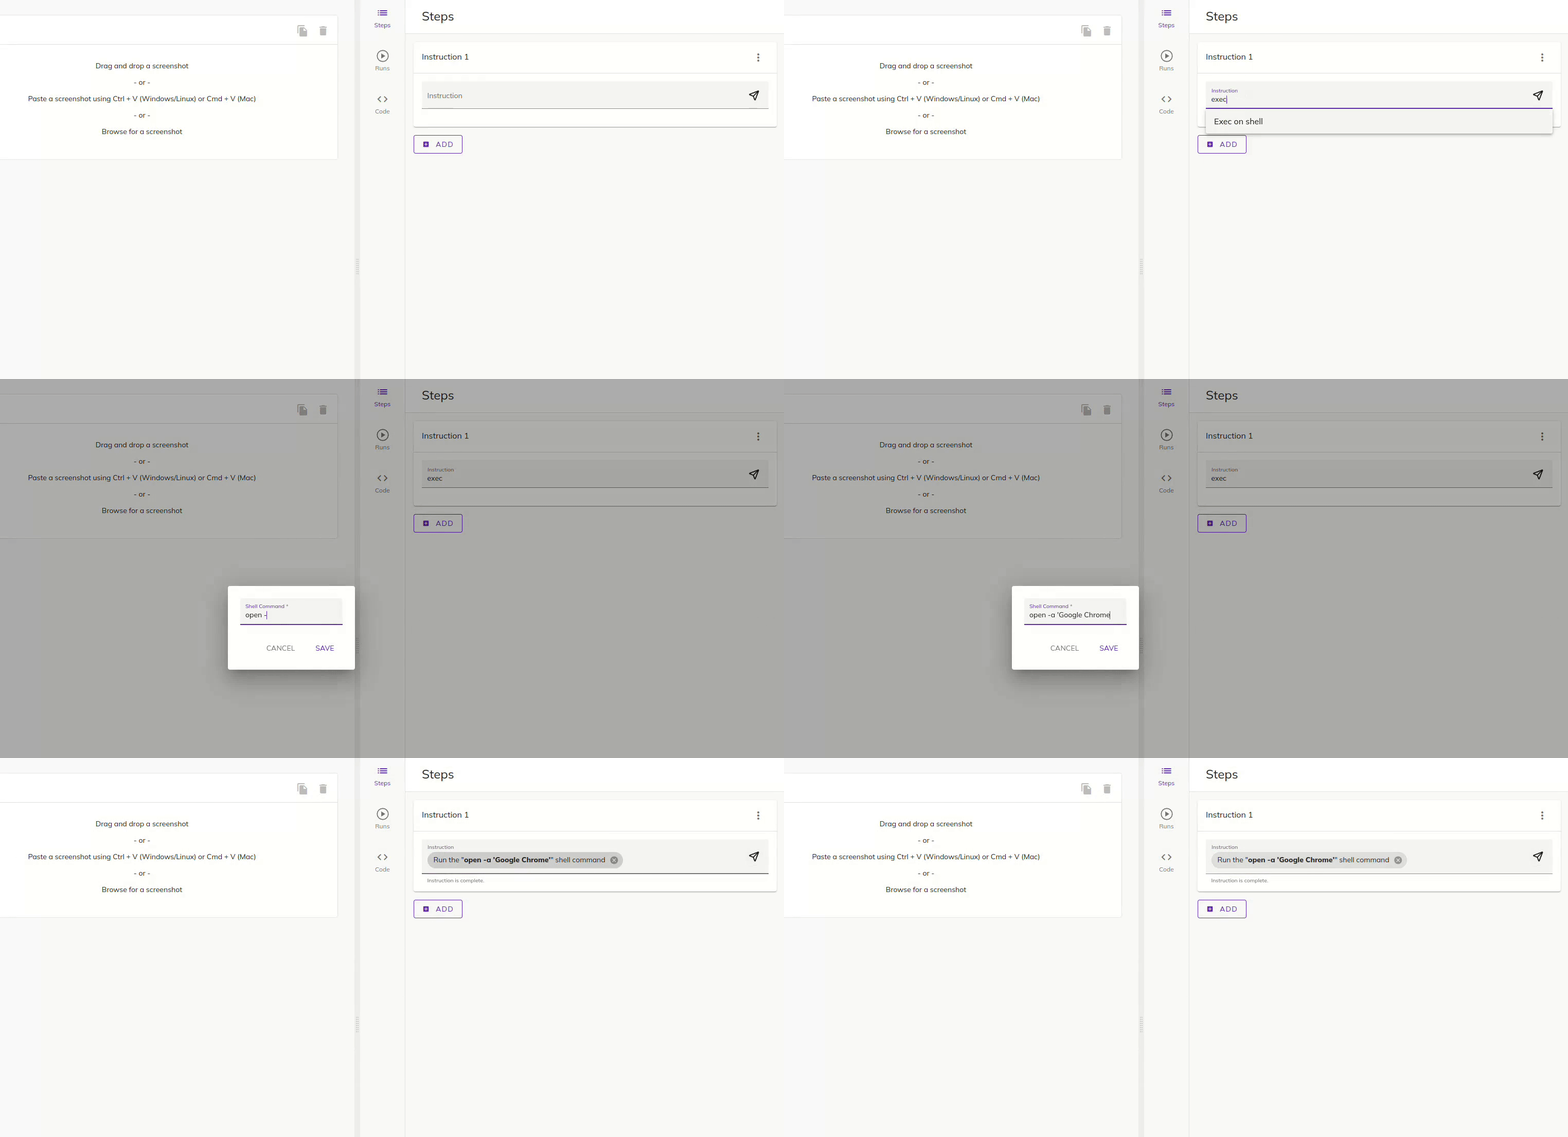
1. Open Chrome Web Browser
Since we plan to use a Self-hosted Runner that runs on your local machine, we would need to start by opening the web browser in the local machine.
To open the Chrome web browser, we can use one of these shell commands depending on the operating system:
- macOS: open -a 'Google Chrome'
- Windows: start chrome
So, let's start by adding this step to our workflow:
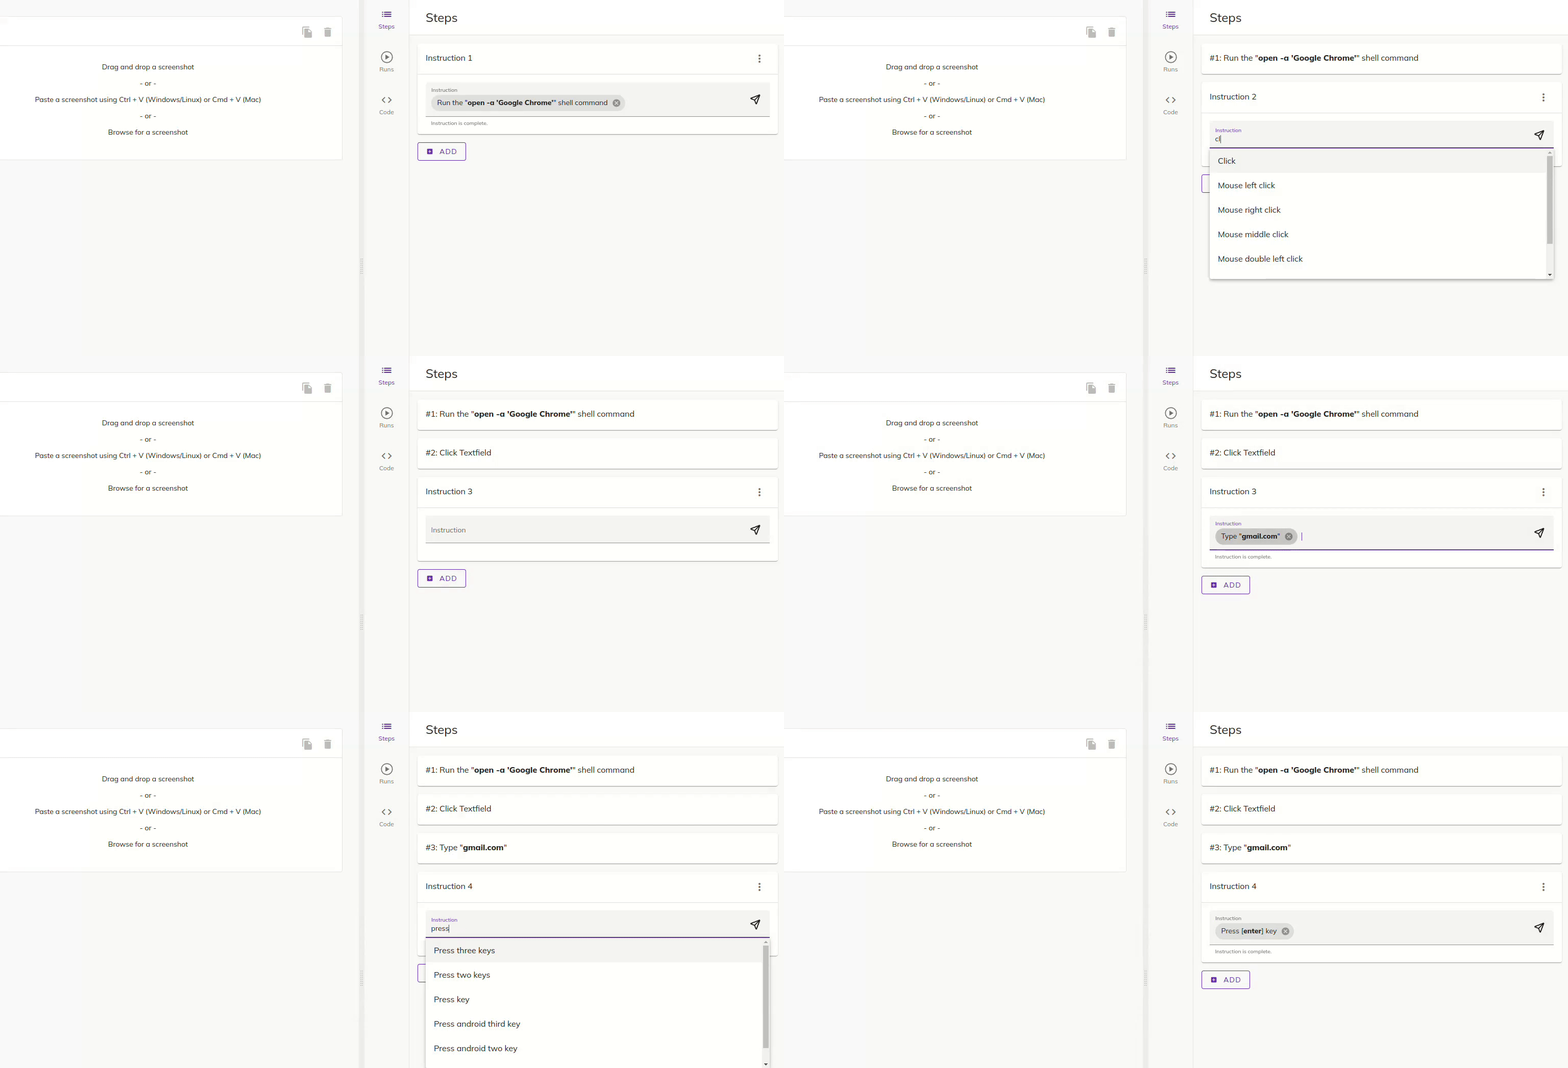
After that, we select the address bar by clicking on the text field, in order to type the address gmail.com:
2. Login with Google Account
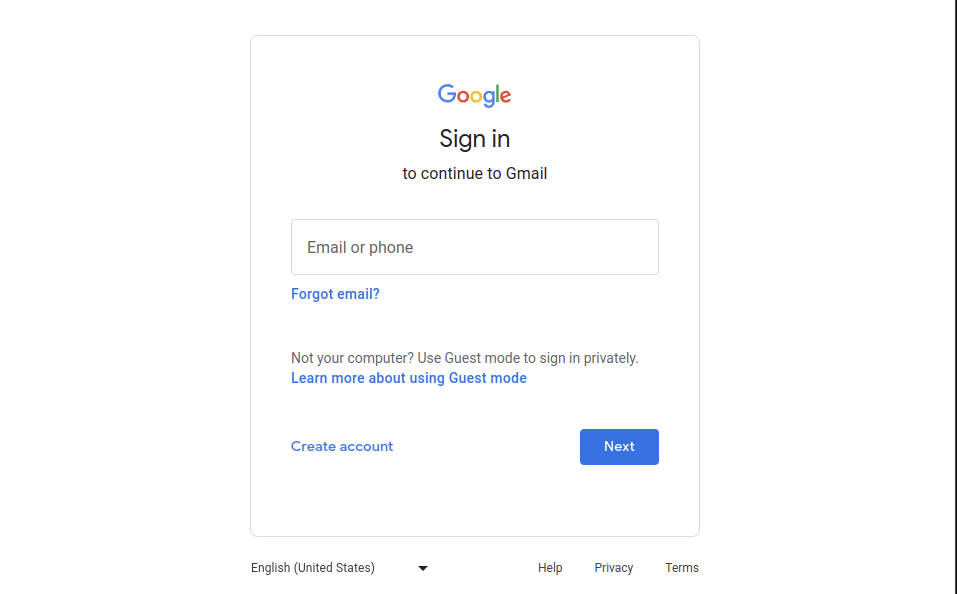
After we arrive at the login page of the Gmail, we will need to login by typing the email and password into the corresponding textfield:
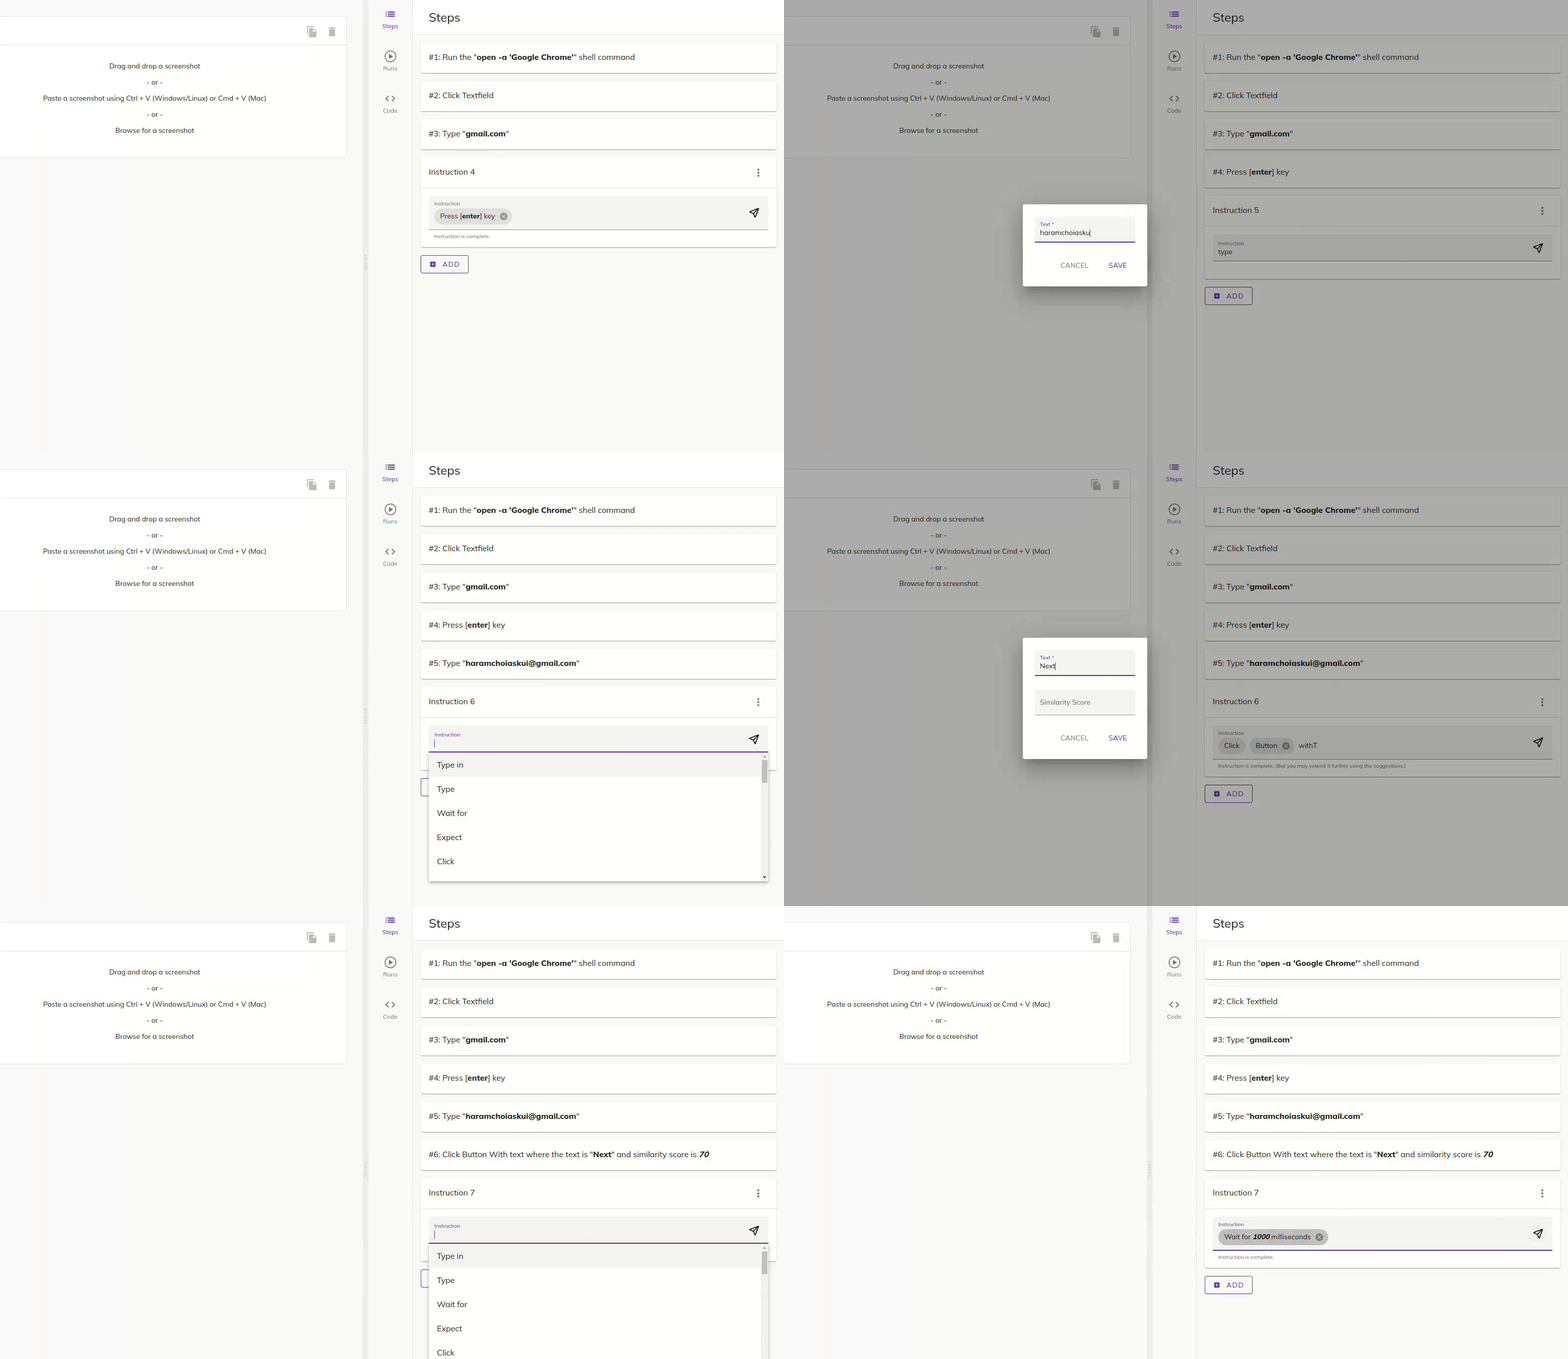
Based on the login page above, the instructions we need for the login will be:
- Type the email address into the textfield.
- Press enter key.
- Wait for a few seconds for the next page to load.
- Type the password into textfield.
- Press the enter key.
⚠️ Bonus
Typing the password right away into the instruction is also fine. But if you are concerned with your password being exposed to our Askui Inference Server, we have another special feature for you.
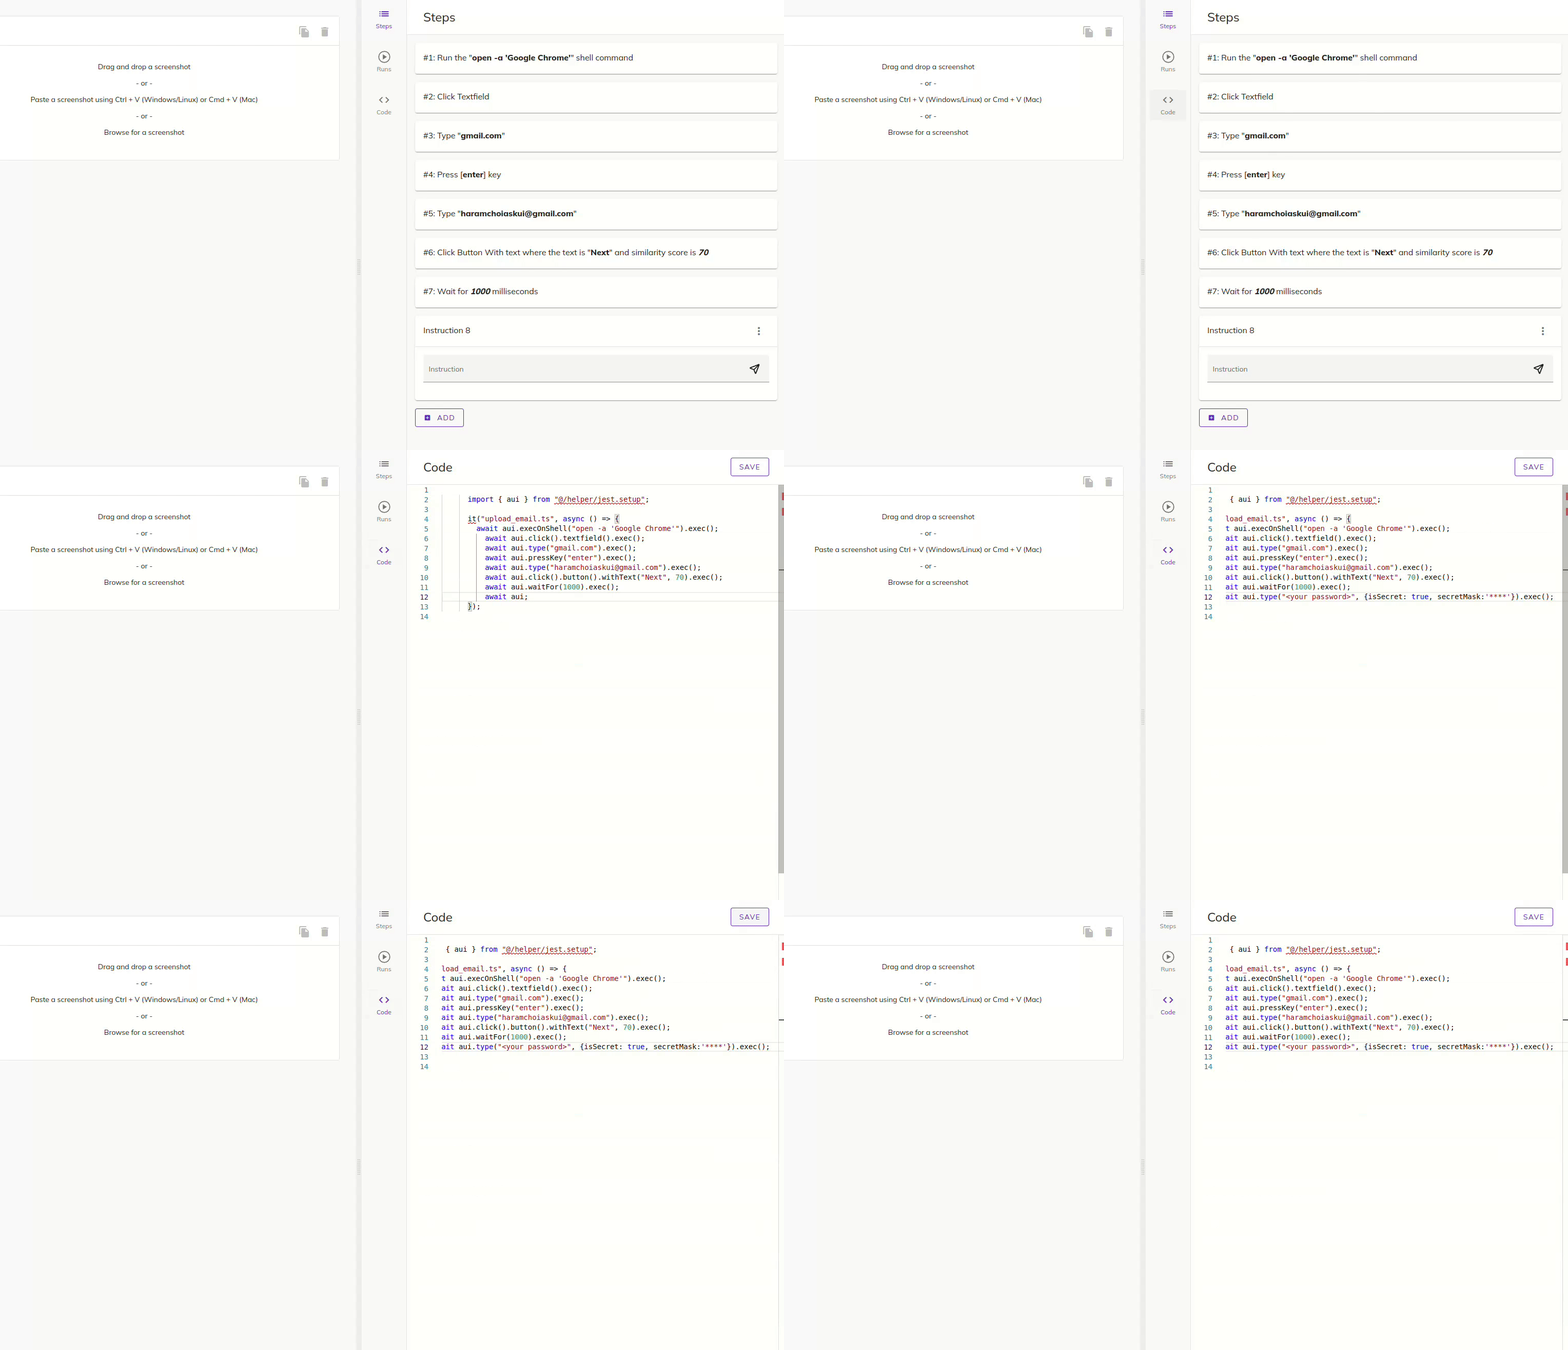
You can explicitly set the input text to be excluded from the log of our Inference Server by using the Code View within the AskUI Studio:
- Go to the Code View by clicking the Code on the sidebar.
- Add this code at the end of the existing instructions.
- Don't forget to replace the <your password> with your real password.
3. Compose the Email
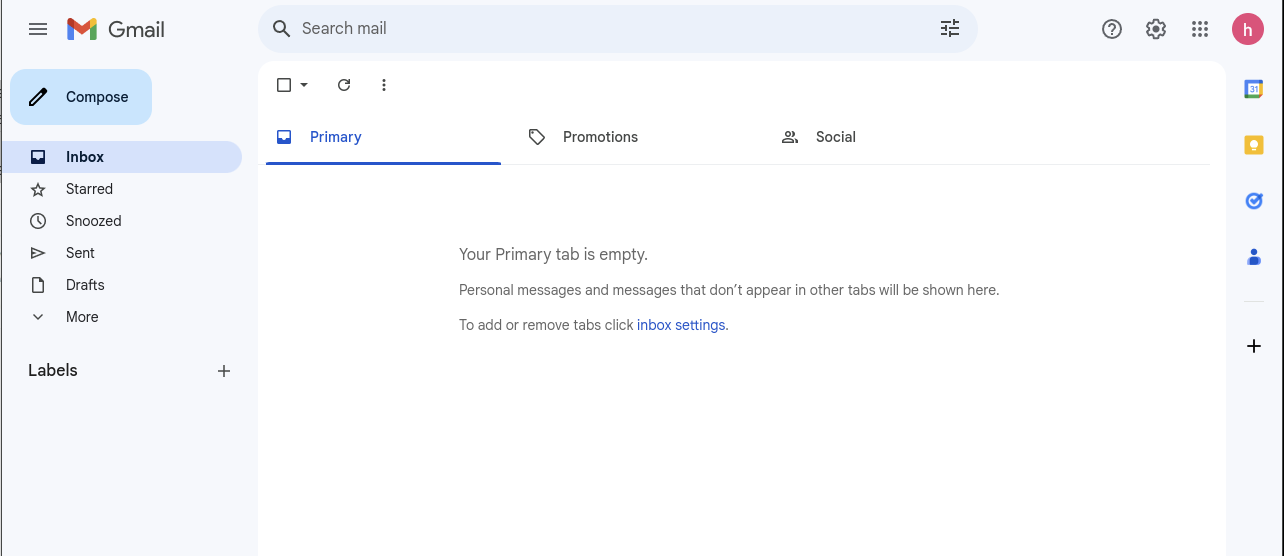
At this moment, we should be logged into the Gmail. The screenshot below shows the page that we will see at this moment:
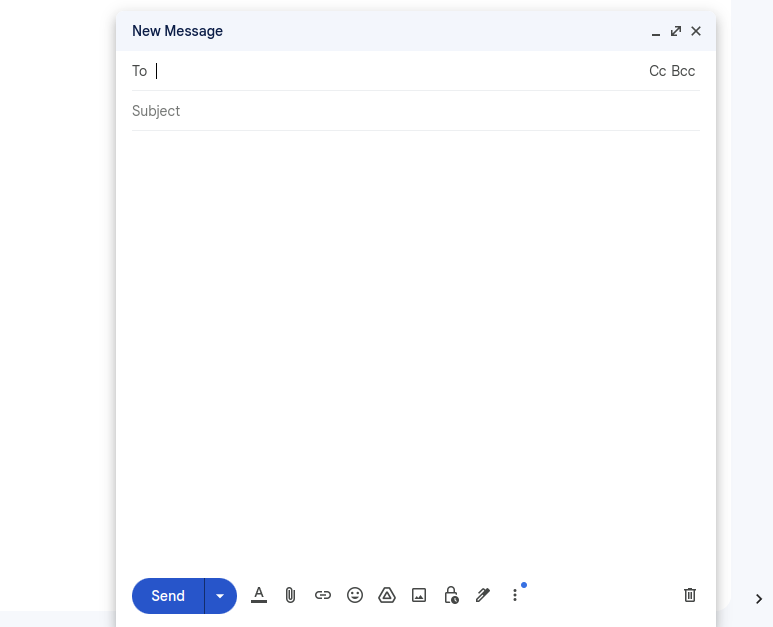
And after we press the blue Compose button on, we will be able to write the email:
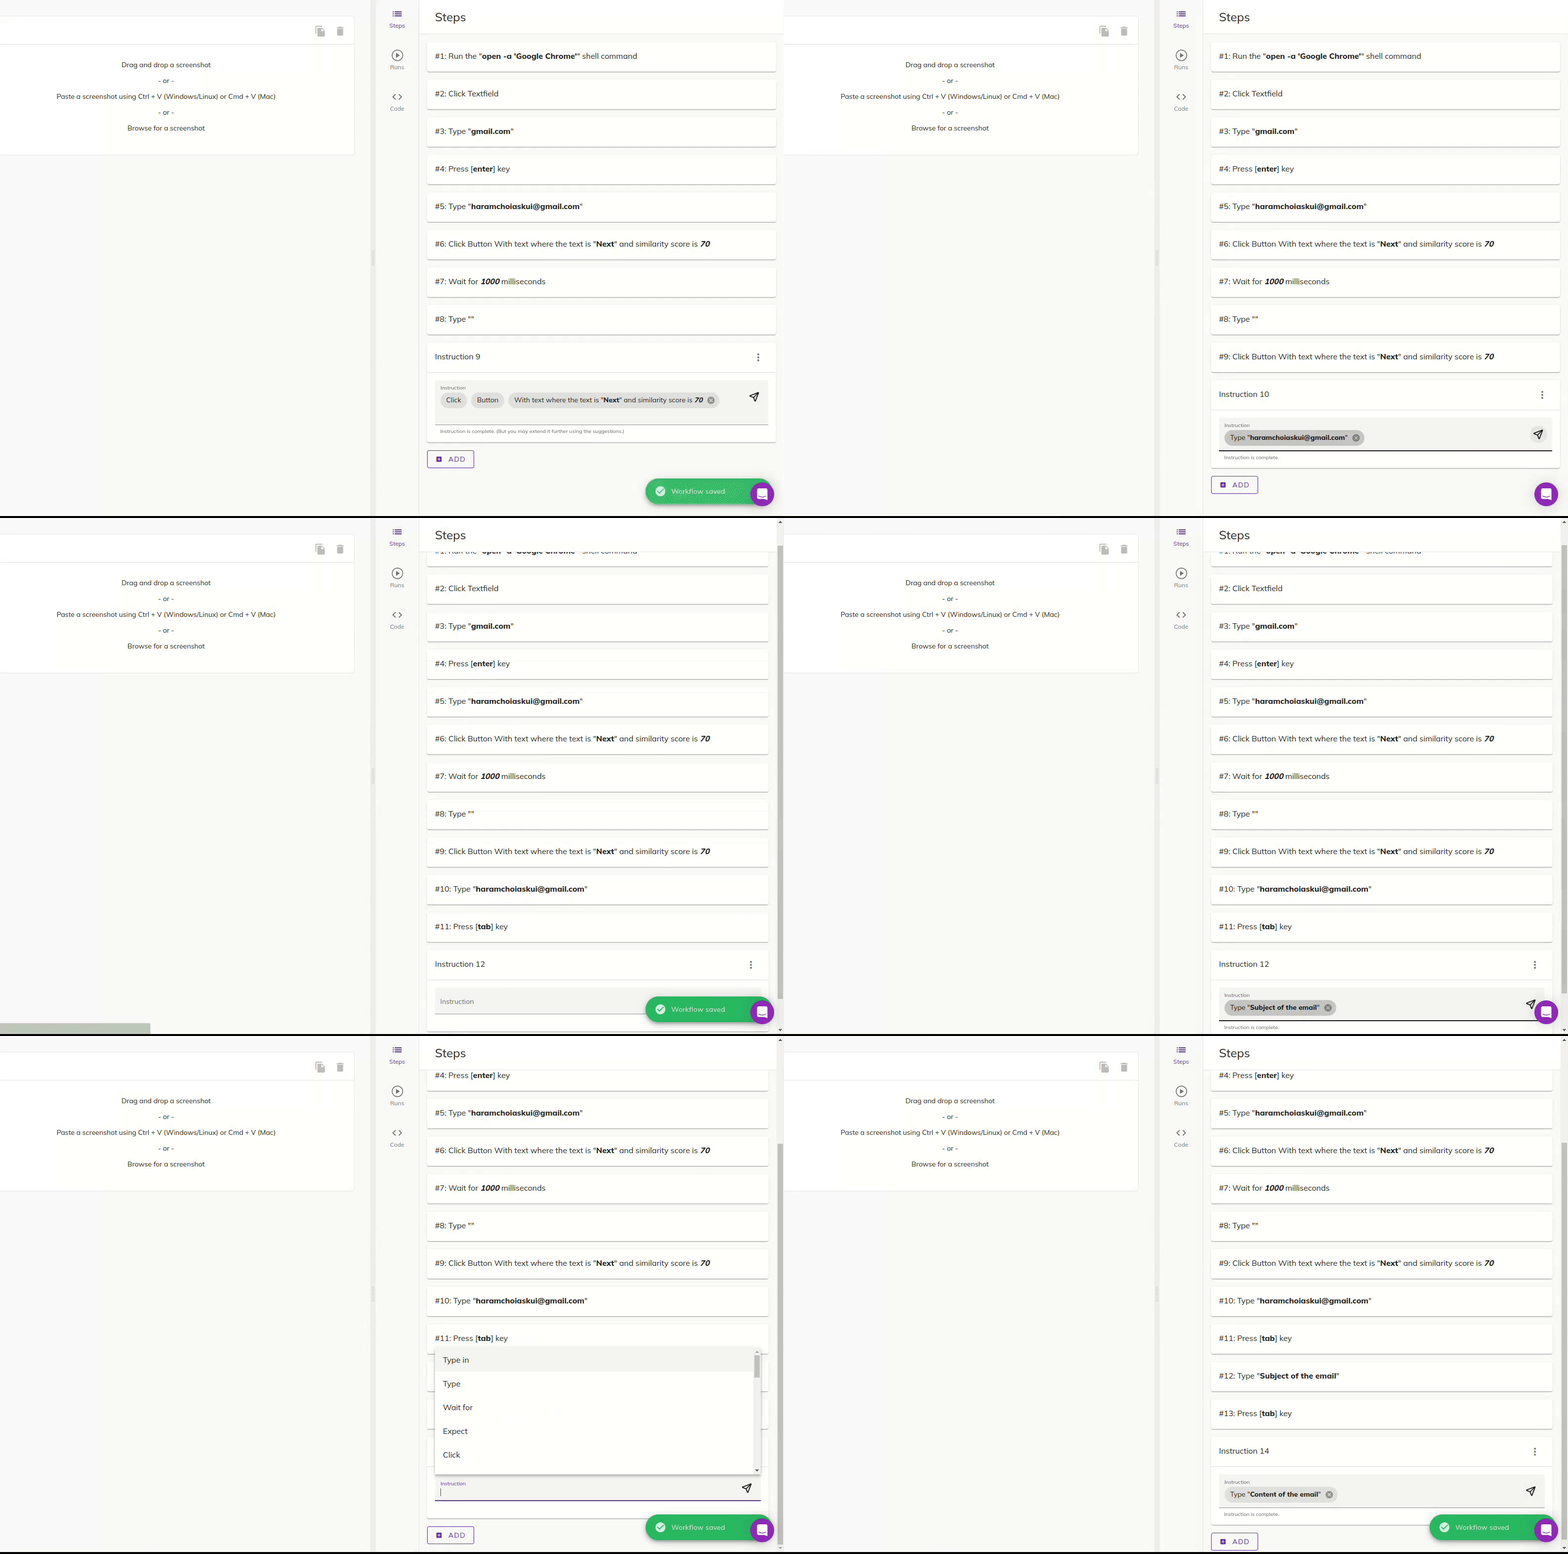
In order to fill in the Recipients, Subject and the Content of the email, we will use the Tab button for the navigation.
The instructions that we will use here are:
- Type the email address of the recipient.
- Press Tab to navigate to the next textfield of Subject.
- Type the subject of the email.
- Press Tab to navigate to the next textfield.
- Type the content of the email.
4. Attach a PDF File
Now we have only the last step left. There are a few different ways to add an attachment in Gmail, but here we will use the graphical interface given by Gmail:
- Click the paper clip icon on the bottom of the message writer.
- Select the attachment file by clicking it.
Here are the steps that we need for the workflow:
- Open the folder that contains the attachment file (Click+icon).
- Browse in the file selecting dialog to select the attachment file (Click+text).
- Click the Open button (Click+text).
- Click the Send button (Click+text).
And here is the final video of the automation running on macOS!
The Code of the Workflow
Here is the code that you can use in the AskUI Studio, as well as with the Askui npm library:
Conclusion
In this guide, we have demonstrated an automation case where we used AskUI Studio combined with a self-hosted runner to send an email with an attachment in a web browser. Even though the demonstration was conducted with a particular email service, Gmail, the technique can universialy applied, regardless the operating system and the email service provider. As we also have utilized the self-hosted AskUI Runner, next time, we will have an in-depth guide for it.
If you have any questions or issues while following the tutorial, feel free to ask questions by joining our Discord channel!


