
.png)
Traditional automation is failing. You’ve felt it. You spend weeks building test suites, only to see them shatter into "flaky tests" the moment a developer pushes a minor UI update. Why? Because those tools are blind.
They rely on a hidden map of code (like XPaths or IDs). When the map changes, the automation is lost.
At AskUI, we decided to solve this problem differently. Instead of building another blind robot, we built an agent that can see.
This isn't just a marketing slogan. It's a fundamental shift in technology. This guide will take you "under the hood" to explain how AskUI's intelligent vision really works, why it's more resilient than any other approach, and how this core technology now powers our enterprise platform, caesr.ai.
The Core Difference: "Blind" vs. "Vision-Based" Automation
To understand how AskUI works, you must first understand how traditional tools (like Selenium or Playwright) work.
1. Traditional "Blind" Automation (DOM-Based)These tools work by parsing the application's DOM (Document Object Model). They find a button by looking for its specific ID or XPath in the code.
- The Problem: This is extremely brittle. If a developer changes
id="login-btn-v1"toid="login-btn-v2", the button looks identical to a human, but the "blind" automation can't find it. The test fails.
2. AskUI's Intelligent Vision AI (Perception-Based)AskUI operates on a completely different level. It doesn't need the DOM. It looks at the same pixels on the screen that you do. Our system is built on three core components that work together.
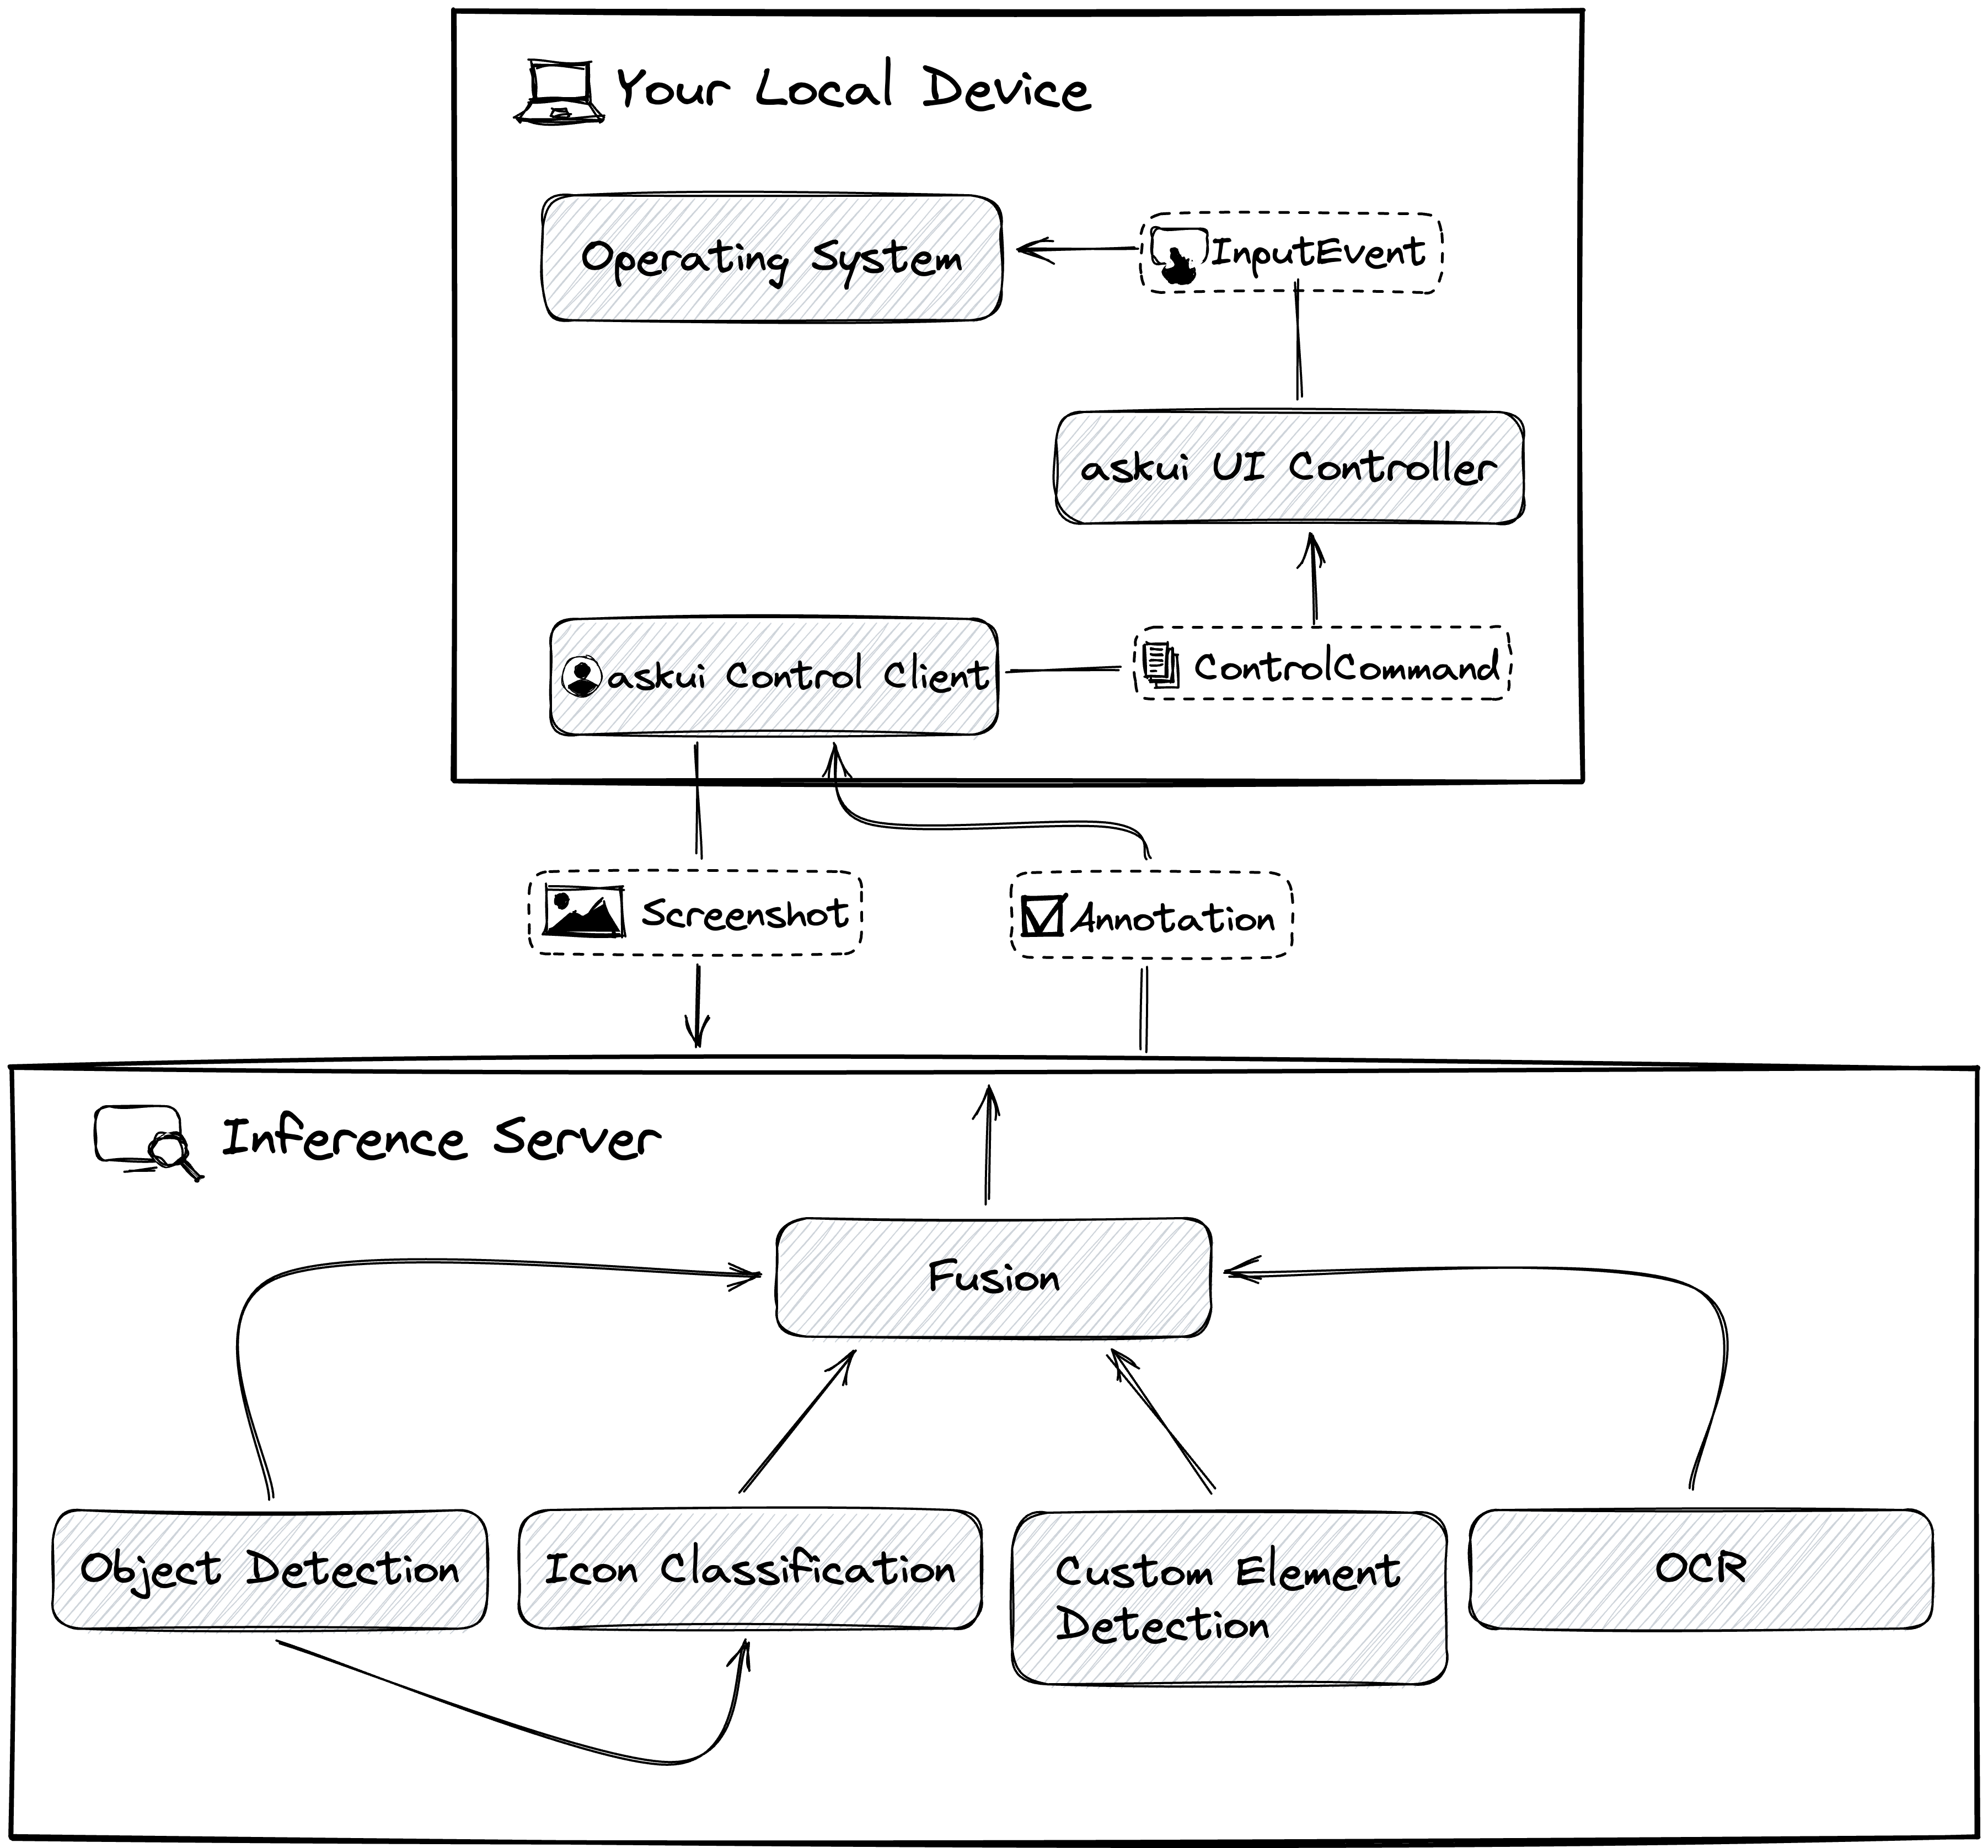
How AskUI Works: The Three Core Components
AskUI's architecture is designed to separate the command (your instruction) from the perception (understanding the screen) and the action (executing the click or typing).
Component 1: The AskUI Control Client
This is the part you interact with directly. The AskUI Control Client (available as a Python or, formerly, a TS library) translates your human-readable instructions into a structured ControlCommand.
- Your Instruction:
await aui.click().button().withText("Login").exec() - Result: A
ControlCommandis generated.
This command is then sent to the UI Controller.
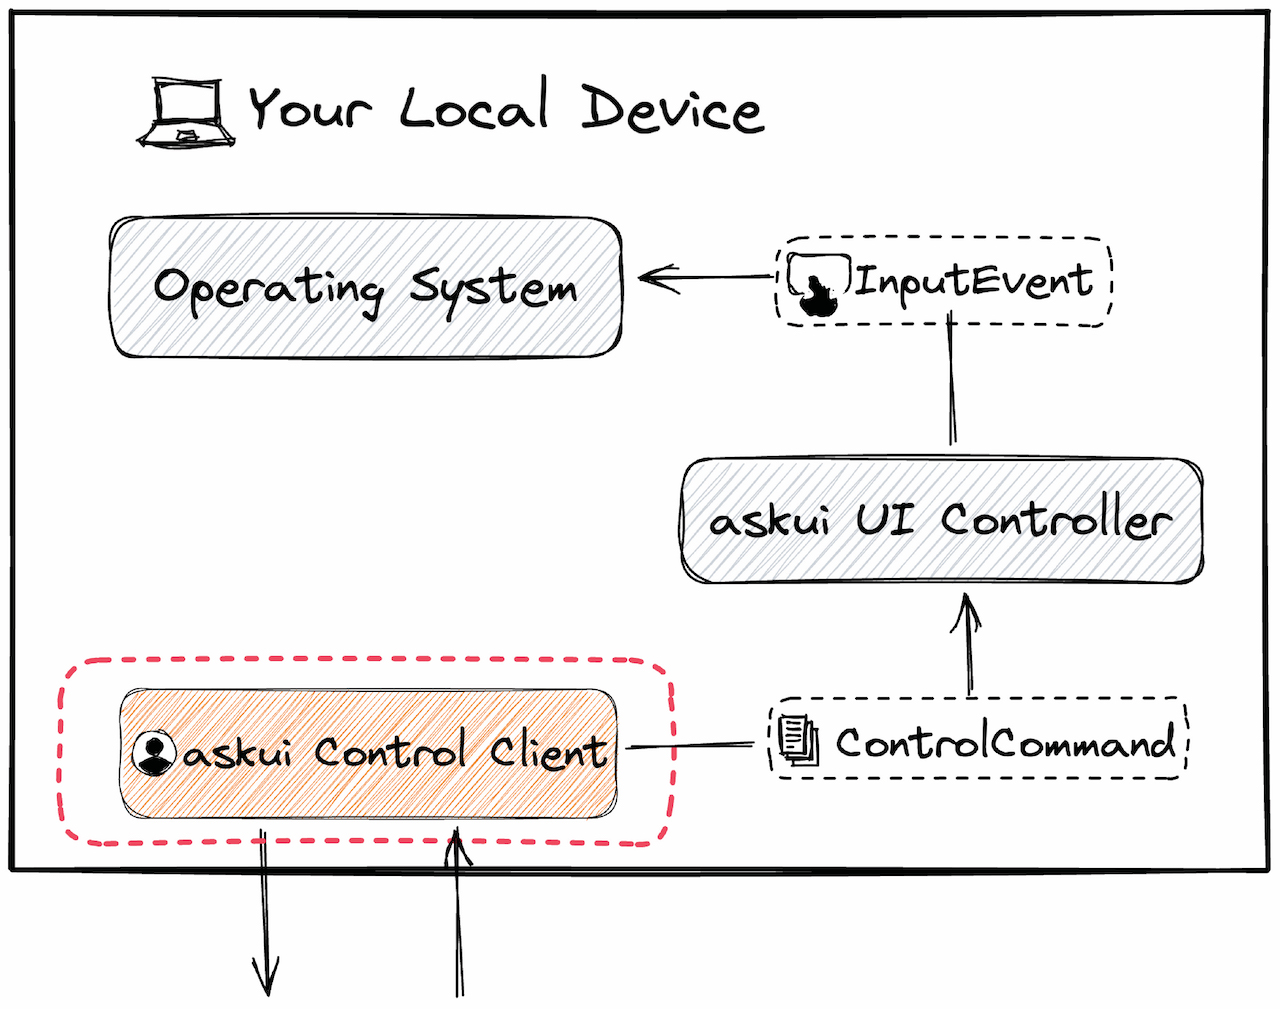
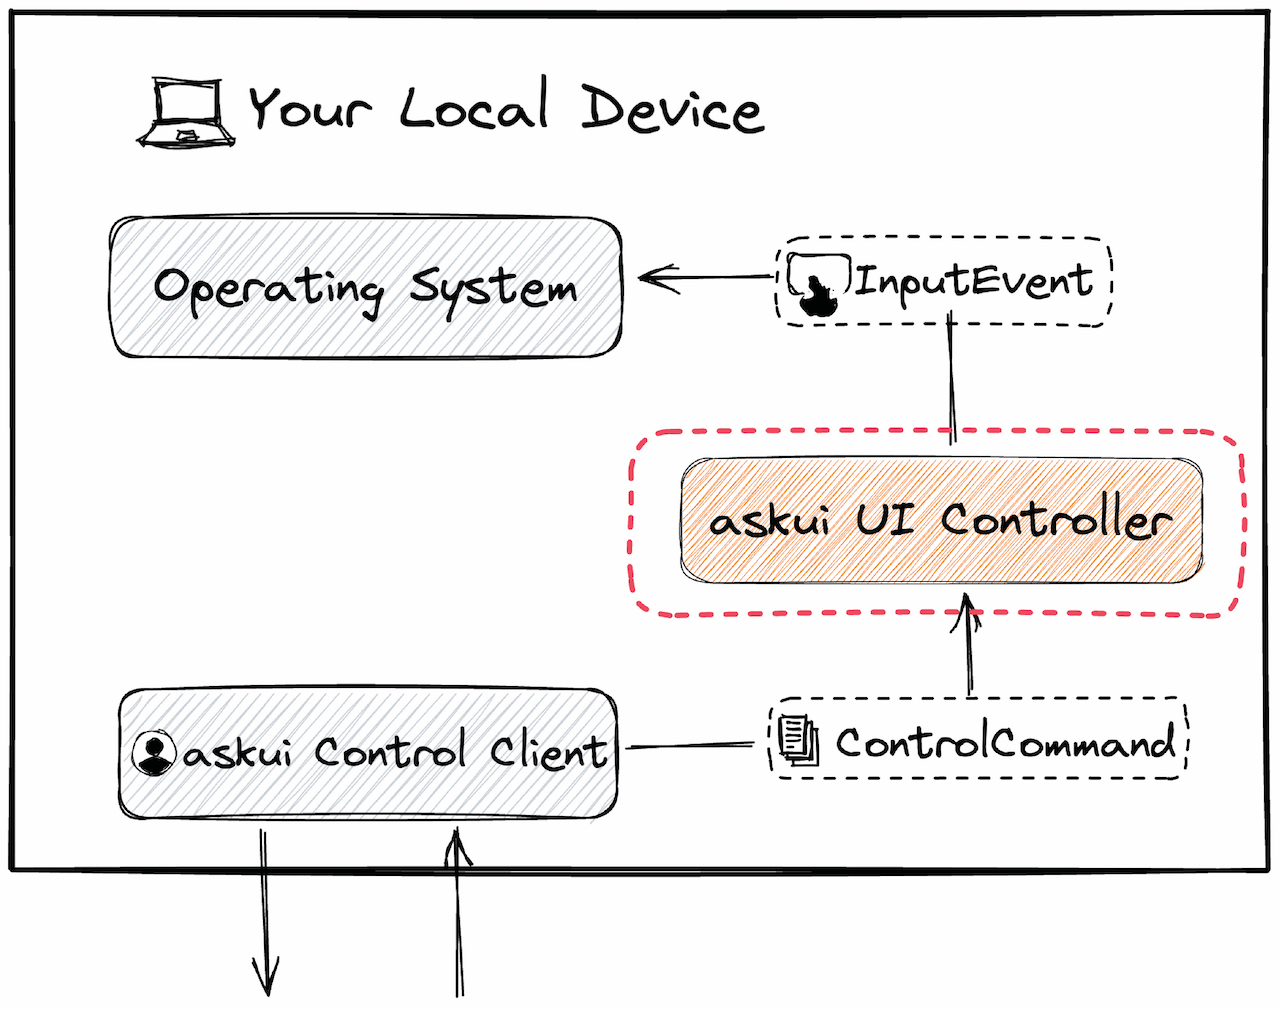
Component 2: The AskUI UI Controller
The askui UI Controller is a lightweight server that runs on the device you want to automate (your local machine, an Android device, a CI runner, etc.). Its job is simple:
- It receives the
ControlCommandfrom your client. - It takes a screenshot of the current screen.
- It sends this screenshot to the Inference Server for analysis.
- Once the server responds, it executes the final action (like an
InputEvent) on the device's Operating System.
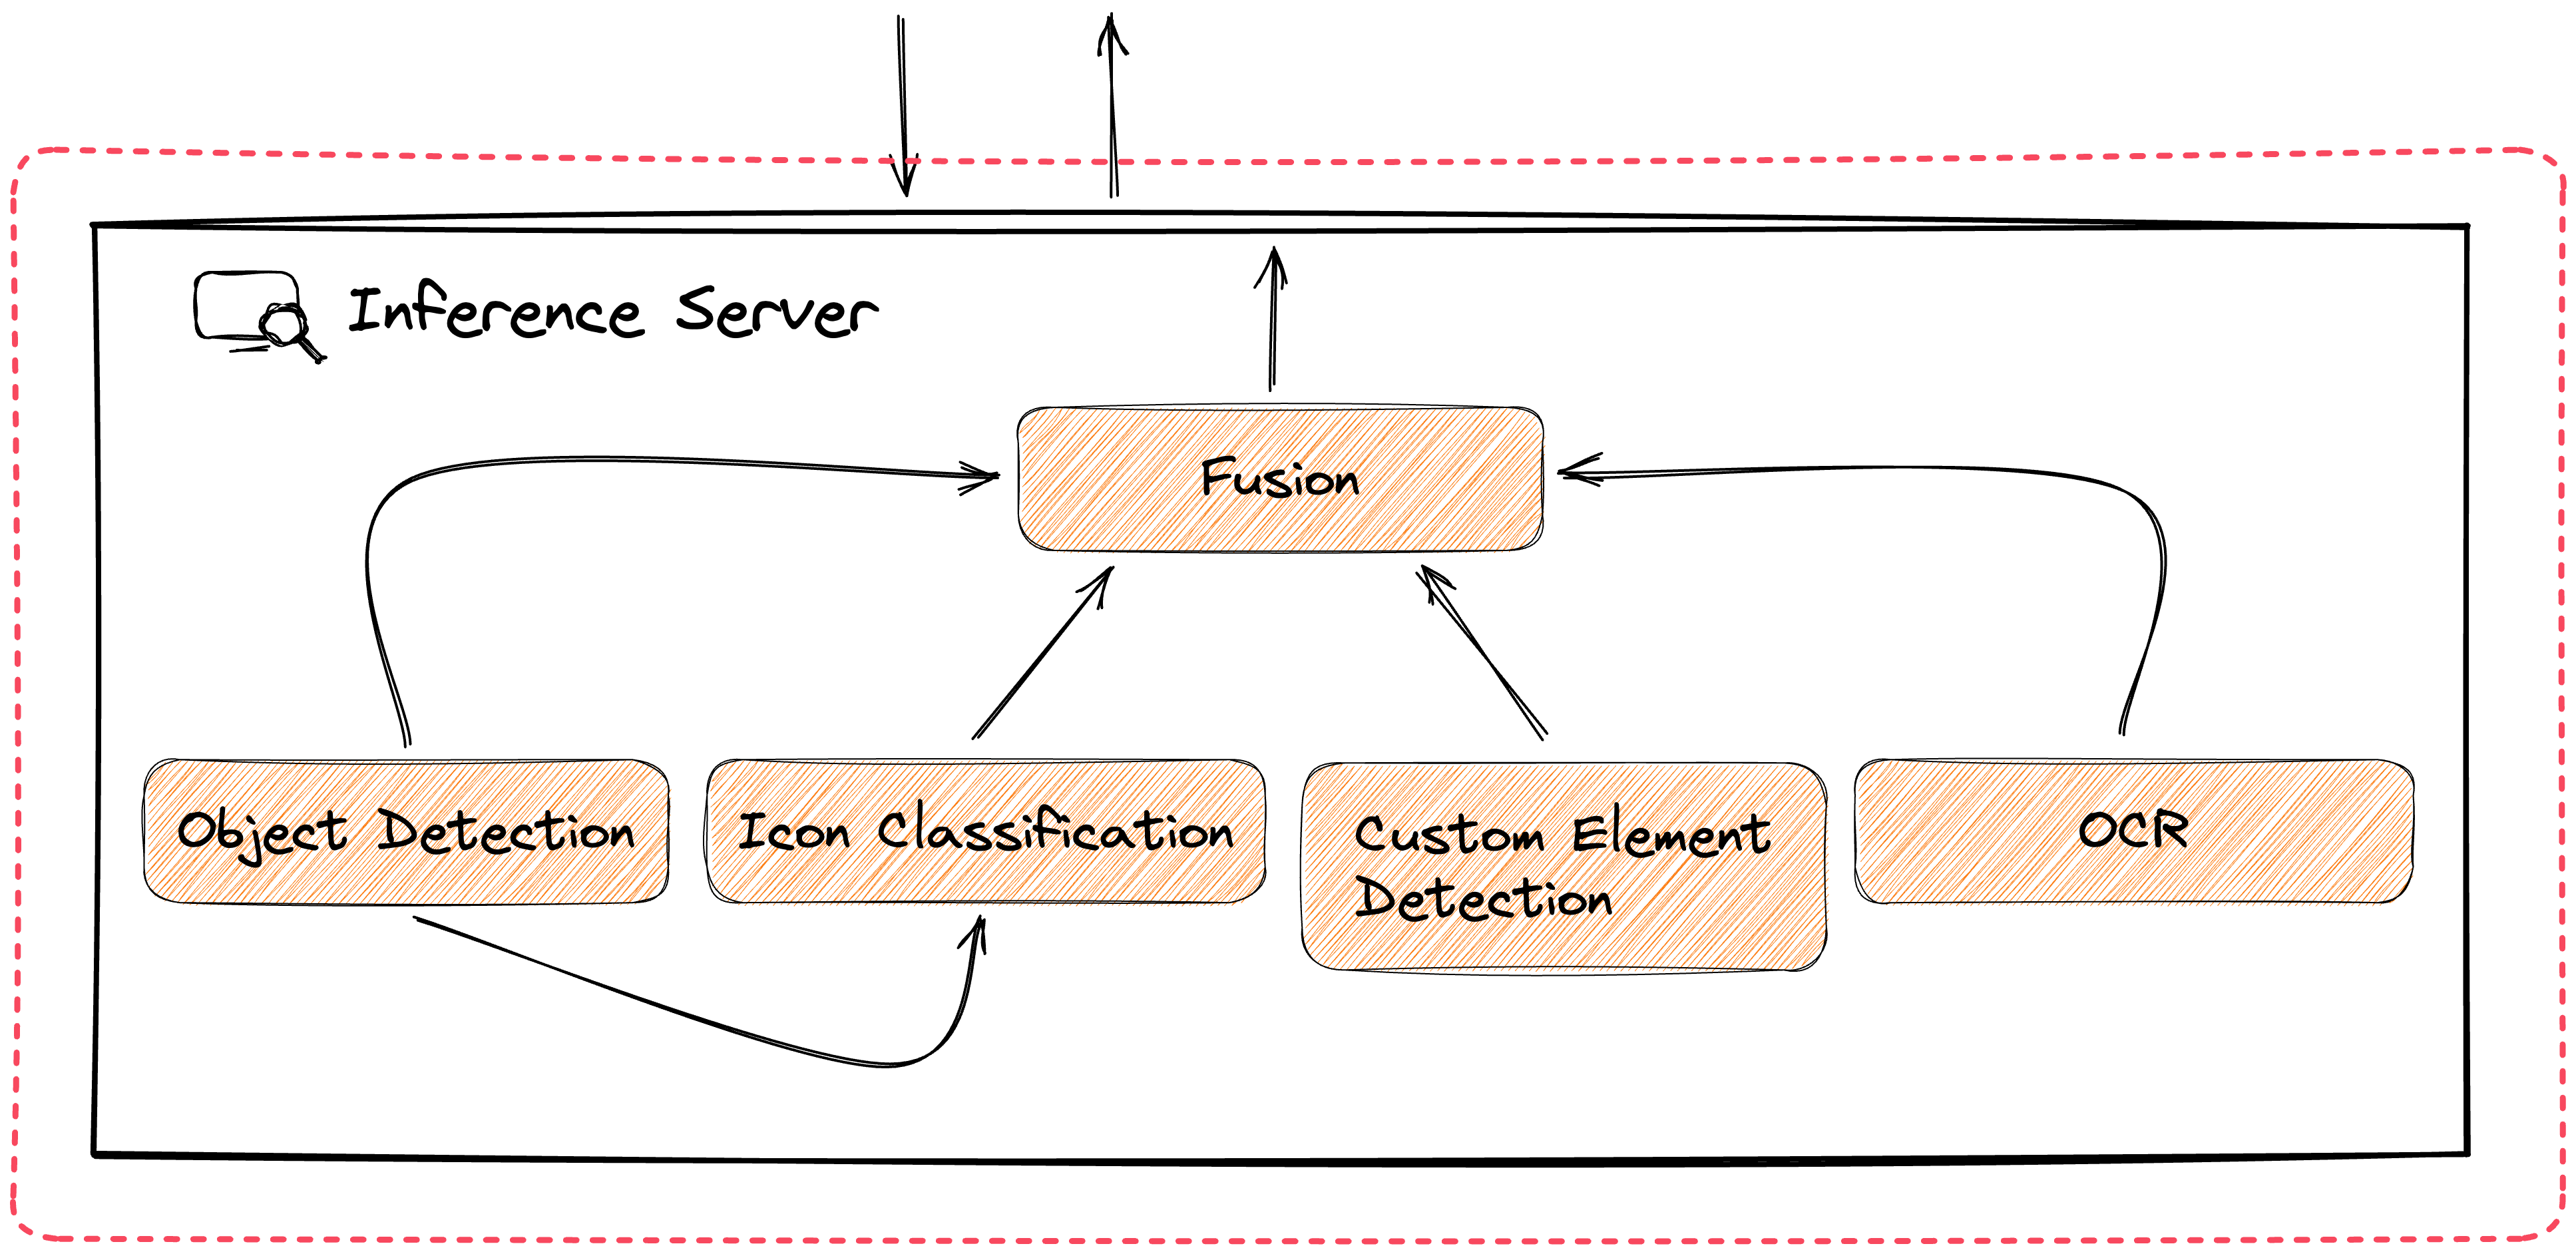
Component 3: The Inference Server (The "Brain")
This is where the "intelligent vision" happens. The Inference Server receives the screenshot and the command. It then uses a sophisticated "Fusion" model to analyze the image, combining multiple AI capabilities:
- Object Detection: Finds common UI elements like buttons, text fields, etc.
- Icon Classification: Identifies common icons (e.g., shopping cart, menu, settings gear).
- OCR (Optical Character Recognition): Reads all the text visible on the screen.
- Custom Element Detection: Allows you to train the model to find unique or custom-designed elements.
The Fusion model combines all this information to find the exact element you asked for. It then sends the coordinates of that element back to the UI Controller for execution.
Putting It All Together: The Full Workflow
When you run a command like aui.click().button().withText("Login").exec(), this is the complete, lightning-fast sequence:
- Client: Your script sends a
ControlCommand(e.g., "Find a 'button' with text 'Login'") to the UI Controller. - Controller: The Controller takes a
Screenshotof the screen. - Controller-to-Server: The Controller sends the
Screenshotand theControlCommandto the Inference Server. - Server: The Inference Server's
Fusionmodel analyzes the screenshot using Object Detection, OCR, etc., to find the "Login" button. - Server-to-Controller: The Server returns the coordinates of the button (or an
Annotation) to the Controller. - Controller: The Controller translates these coordinates into a native
InputEvent(a click) and sends it to the Operating System.
This Unlocks "Automation for the Unautomatable"
This "see, understand, then act" architecture is fundamentally more resilient than traditional automation. Because it doesn't rely on code-based locators, it can reliably automate "black box" environments where other tools fail:
- HTML5 Canvas Applications
- Remote Desktops (Citrix, VDI)
- Legacy Desktop Applications
- Any Cross-Platform Workflow
From Core Tech to Enterprise Platform: The Role of caesr.ai
This powerful, vision-first agent is the core technology that powers our enterprise platform, caesr.ai.
While the core agent is perfect for developers building specific automations, caesr.ai is the "control tower" that allows you to orchestrate these agents at scale. It lets you build, manage, and monitor entire end-to-end business processes (e.g., "Log into Salesforce, open the 'Reports' tab, and export the 'Q4 Leads' file") using natural language, all running on this resilient, vision-based foundation.
Final Thoughts
AskUI works by replacing brittle, code-based locators with human-like visual understanding. This simple, powerful shift not only eliminates flaky tests but also unlocks automation for previously "unautomatable" applications.
It’s the difference between a blind robot following a map and a sighted co-worker who can see the destination.
Ready to stop fixing broken scripts and start building resilient automation? See caesr.ai in Action
About the AskUI Content Team
This article was written and fact checked by the AskUI Content Team. Our team works closely with engineers and product experts, including the minds behind caesr.ai, to bring you accurate, insightful, and practical information about the world of Agentic AI. We are passionate about making technology more accessible to everyone.

.png)


