
.png)
What is Flutter and Why Automate It?
Flutter is Google’s open-source UI toolkit for building Android, iOS, web, and desktop apps from a single codebase launched in 2017.
Because Flutter creates custom-rendered UI rather than standard DOM elements, traditional automation tools often fail. This makes AskUI ideal for Flutter testing.
Can AskUI Automate Flutter Apps?
Yes . AskUI performs black‑box, visual UI automation, interacting with what's visible on the screen rather than relying on selectors or accessibility attributes. It works equally well across web and native Flutter apps.
Step 1: Set Up the Flutter App for Testing
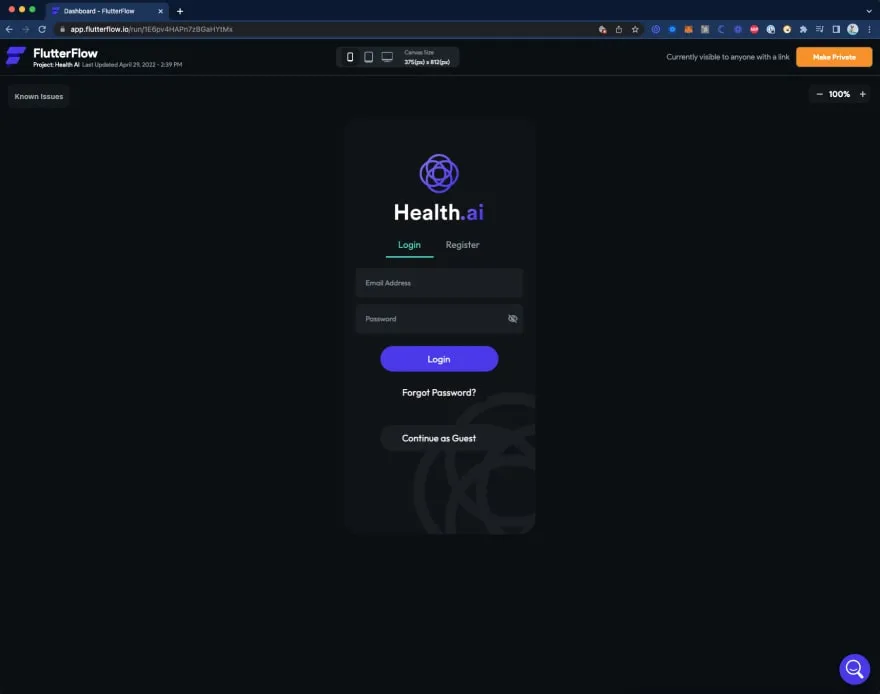
In this tutorial we use the Health.ai demo app created with FlutterFlow, running publicly at:
URL:https://app.flutterflow.io/run/AskUI requires only that the app window be visible on screen source code or internal selectors are unnecessary.
Step 2: Launch the App with AskUI
Use this script to launch the demo app in a browser:
await aui.typeIn("https://app.flutterflow.io/run/1E6pv4HAPn7zBGaHYtMx").url().exec();
await aui.pressKey('enter').exec();
Browser window after loading:

Step 3: Inspect Recognized UI Elements
Run an annotation test to capture what AskUI recognizes visually:
it('Annotation', async () => {
  await aui.annotate();
});
Step 4: Automate the Login Process
Test login with this sequence:
- Enter email
- Enter password
- Click "Login"
- Verify "Good Morning" message
await aui.typeIn("info@askui.com").textfield().contains().withText("Email Address").exec();
await aui.typeIn("test123").textfield().contains().withText("Password").exec();
await aui.click().text().withText("Login").exec();
await aui.expect().text().withText("Good Morning").exists();
Screenshot of the login UI:
Full Test Script for Flutter Login
import { aui } from './helper/jest.setup';

describe('jest with askui', () => {
  it('Flutter App Login Form', async () => {
    // Open Flutter App
    await aui.typeIn("https://app.flutterflow.io/run/1E6pv4HAPn7zBGaHYtMx").url().exec();
    await aui.pressKey('enter').exec();

    // Fill In Form
    await aui.typeIn("info@askui.com").textfield().contains().withText("Email Address").exec();
    await aui.typeIn("test123").textfield().contains().withText("Password").exec();

    // Login
    await aui.click().text().withText("Login").exec();

    // Verify Login
    await aui.expect().text().withText("Good Morning").exists();
  });

  it('Annotation', async () => {
    await aui.annotate();
  });
});
To run:
AskUI-RunProjectEnsure the app window is visible during execution.
Can I Run Tests on Emulators or Real Devices?
Yes .AskUI works on Android devices (real/emulator) using ADB or desktop environments. Just launch the app manually before automation begins.
FAQ
Can I use AskUI with non‑Flutter apps?
Yes . AskUI works across desktop, web, and mobile apps by visually interacting with UI elements regardless of the underlying framework.
Why choose AskUI for Flutter?
Flutter UIs render as canvas, not typical DOM elements. AskUI bypasses this limitation using computer vision, enabling robust, low-maintenance automation.
Next Step:
👉 Explore AskUI Automation Example with Flutter (2025 Guide) for full device setup and CI integration.

.png)


