Run AskUI Studio's Workflow on Your Local Windows Machine with Self-Hosted Runner


In this guide, we will walk you through the steps that you need for running an AskUI self-hosted runner on your local Windows machine. The AskUI self-hosted runner is a self-hosted component that downloads your workflows from AskUI Studio and runs them on the device it is hosted at. So this guide presumes that you already have an account for the AskUI Studio as well as know how to create a workflow in it. If you don't have an account yet, please first create one here for free.
Table of Content
- Install the Remote Device Controller
- Create a Workflow in the AskUI Studio
- Run AskUI Development Environment (ADE)
- Connect Your AskUI Account
- Run the Self-Hosted Runner
- Run the Workflow in the AskUI Studio
1. Install the Remote Device Controller
First, install the Remote Device Controller with the AskUI Installer.
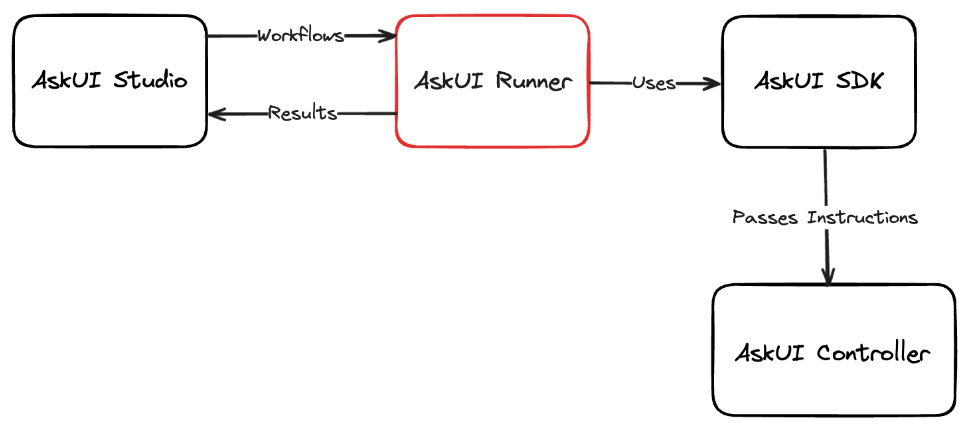
It will install the following components:
- AskUI Controller
- AskUI Development Environment (ADE)
- AskUI Development Kit (SDK)
- AskUI Runner (Executing workflows from AskUI Studio)
Here is a more descriptive explanation of the installation process (link to the documentation).
2. Create a Workflow in the AskUI Studio
Now let's create a simple workflow for testing our self-hosted runner on the local Windows machine.
First create a new workflow with the name windows_test, then copy and paste the code below into the Code view:
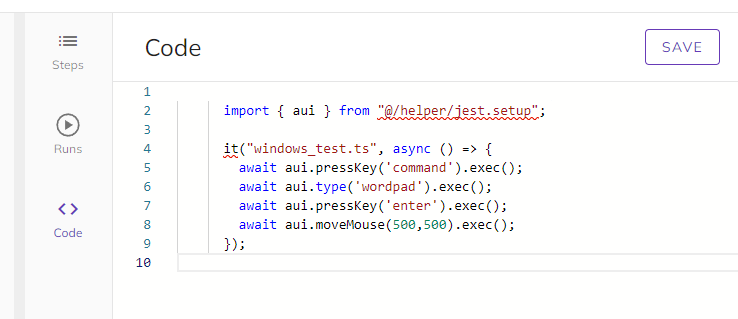
After pressing the SAVE button on the right top corner, you will have a workflow created in your Steps view:

Quickly explained, this workflow will,
- Press the command key, which is equivalent to the windows key.
- Type wordpad in the search field of the start menu.
- Press the enter key to open the Wordpad app.
- Move the mouse cursor to the coordinate 500, 500.
It is a very simple workflow that automates the process of opening the Wordpad app on your local Windows machine and move the mouse cursor to a certain coordinate, yet good enough to ensure that the AskUI self-hosted runner is properly prepared on your local machine.
3. Run AskUI Development Environment (ADE)
- Open a terminal. We recommend using PowerShell.
- Run the command askui-shell (type it and press Enter). This brings you into the AskUI Development Environment (short ADE) where you can configure your installation, start the AskUI Controller, create new AskUI-Projects and run workflows.
4. Connect Your AskUI Account
Run the following command to authenticate and connect your ADE to your AskUI account. Replace the strings with your real credentials.

Validate the settings with the following command:
5. Run the Self-Hosted Runner
To run this workflow on your local Windows machine, we will need to run two different components on the local machine.
First start the AskUI Controller with the command below:
This will start the AskUI Controller and will select the first display(index 0) from the left side as the target display to be automated. You can skip the DisplayNum option if you have only one display.

After running the AskUI Controller, open another PowerShell window and run the command after activating the ADE with askui-shell as same in the previous step:

The Tags option tells the runner which Run from your AskUI Studio it shall fetch the workflow from. We will run our workflow with the exactly same tag in the next step.
6. Run the Workflow in the AskUI Studio
Now let's go back to our AskUI Studio and run the workflow.
Go to the Runs view by clicking the Runs tab on the side.
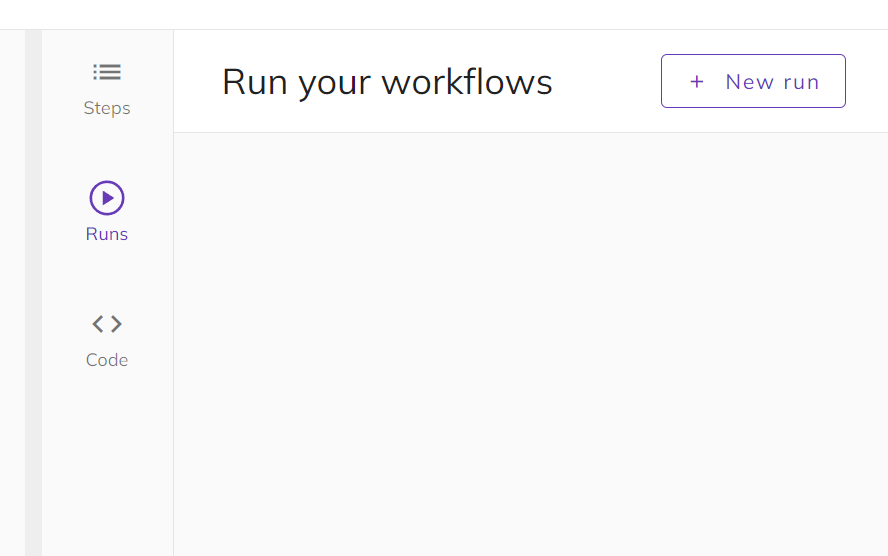
Then, click the [+ New run] and create a new run with the information below. It is important to give the exact same Tag as we did in the PowerShell in the previous step:
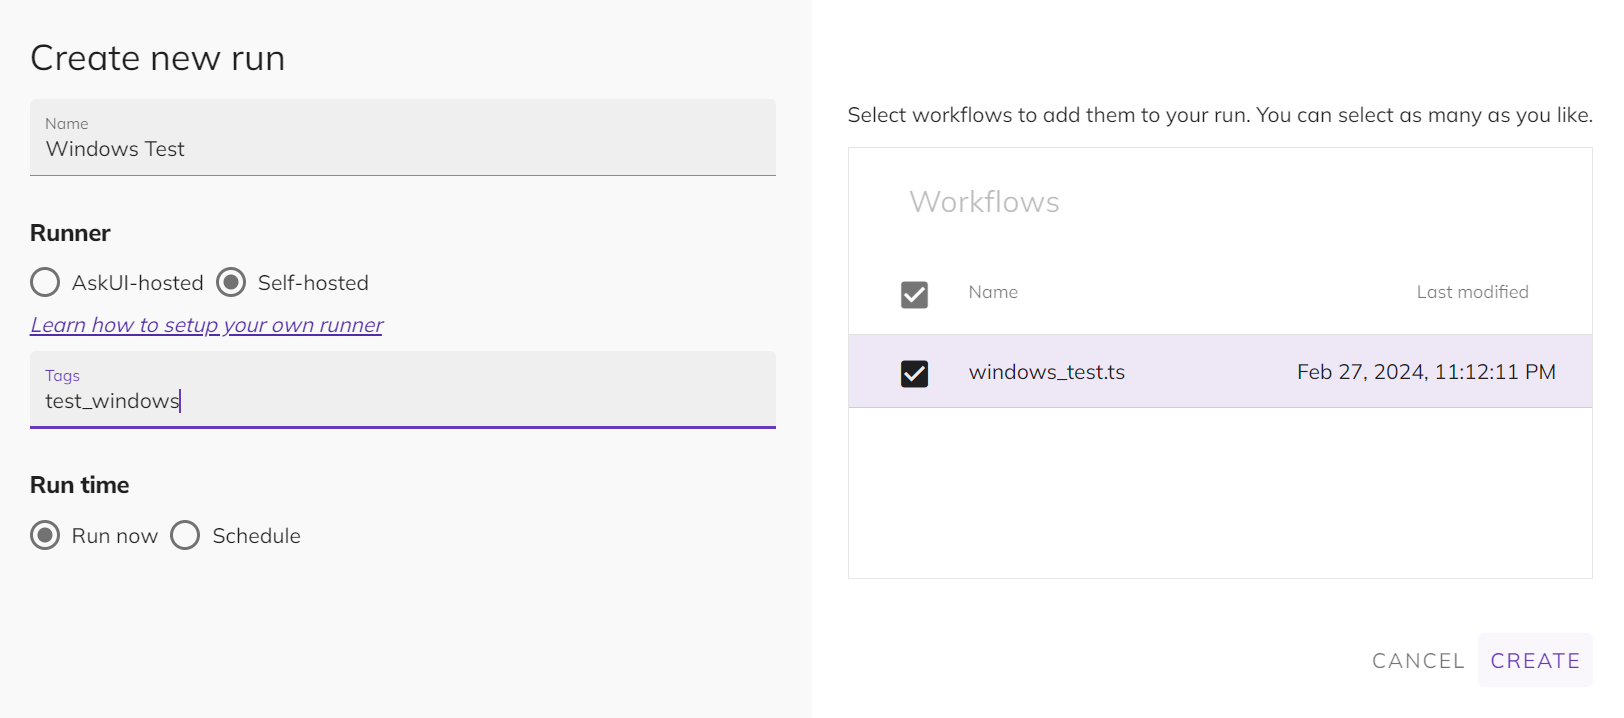
After creating a new run by clicking the CREATE button, the AskUI Runner will start to run the selected workflow on the local Windows machine. Here is the full video of the automation that we run:
Conclusion
Following the steps outlined in this guide, you have successfully set up and run an AskUI self-hosted runner on your local Windows machine. This enables you to automate tasks using workflows created in the AskUI Studio directly on your device. If you need more informations of our ADE and self-hosted runner on Windows, please check out our official documentations listed below:
And if you face issues or get more questions about AskUI, don't hesitate to contact us!
More to explore
Get in touch
For media queries, drop us a message at info@askui.com